
How to Connect a MacBook to a Monitor: A Step-by-Step Guide
Do you need help leveling up your MacBook's screen space? Increase productivity and vastly improve your viewing experience by adding an external monitor! Your workspace can be transformed miraculously with this simple hack. Stick with us as we walk you through the process step by step, simplifying how you can seamlessly connect your beloved MacBook to a monitor. Prepare for an elevated computing experience like never before!
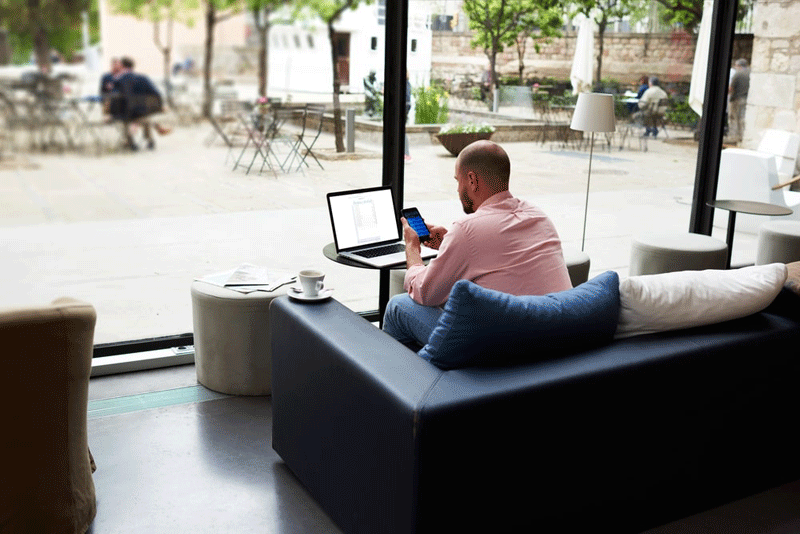
To connect your MacBook to a monitor, identify the correct port on your Mac (such as Thunderbolt or HDMI) and connect the video cable accordingly. If the cable requires a port your Mac doesn't have, you can use an adapter or replace the video cable. Once connected properly, your Mac will automatically detect the display, and you can configure display settings in System Preferences > Displays.
Setting Up Mac's Hardware for Display Connection

Before connecting your MacBook to a monitor, it's important to have the necessary hardware set up. This includes having the appropriate cables and adapters and identifying the correct port on your MacBook for the display connection.
Identifying the Correct Port on MacBook
To connect your MacBook to a monitor, you must first identify the correct port on your specific MacBook model. The type of port you will be using depends on the age and model of your MacBook.
For example, a 2023 MacBook Pro (14-inch, Nov 2023) with the M3 chip includes two Thunderbolt / USB 4 ports. The model identifier is Mac15,3. On the other hand, if you have a 2023 MacBook Pro (14-inch, Nov 2023) with either the M3 Pro or M3 Max chip, it includes three Thunderbolt 4 ports. The model identifiers are Mac15,6, Mac15,8, and Mac15,10.
Finding Your MacBook Model and Port Type
It's worth noting that other models, with their specifications and part numbers, are listed for previous years, such as the 2022 MacBook Pro (13-inch, M2), 2021 MacBook Pro (14-inch), and 2021 MacBook Pro (16-inch).
If you're unsure about your MacBook model or port type, use tools like "About This Mac" or the "System Information" app on your macOS device to find this information. Alternatively, if you can't access your Mac, you can find the serial number on the underside or original packaging and use it to check the model on Apple's website.
Choosing Compatible Cables and Adapters

Before you can connect your MacBook to a monitor, it's crucial to ensure that you have the right cables and adapters compatible with your specific MacBook model. The connection options vary depending on the year of release and the port configurations of your MacBook.
Cables and Adapters for MacBook Air Models
For MacBook Air models introduced in 2022 or later, you can use a USB-C charge cable with the Apple 30W USB-C Power Adapter or other compatible USB-C power adapters. For an enhanced docking experience, consider using the ULTIMATE DOCK: USB C DOCK GEN 2 for seamless connectivity and additional port options. However, for MacBook Air models introduced in 2018 or later, you will need a 45W MagSafe Power Adapter with a MagSafe 2-style connector. The ULTIMATE DOCK: USB C DOCK GEN 2 can also be a valuable addition to your setup, providing versatile connections and expanding your MacBook's capabilities.
Cables and Adapters for Older MacBook Air and MacBook Pro Models
On the other hand, if you have a MacBook Air model introduced between 2012 and 2017, you will need a 45W MagSafe Power Adapter with an L-style connector. Lastly, for any MacBook Pro model, the power adapter and cable needed will depend on the specific model and year of release. For example, the 16-inch MacBook Pro models introduced in 2019 require an Apple 96W USB-C Power Adapter and USB-C Charge Cable, while the 13-inch MacBook Pro models introduced in 2016 or later require an Apple 61W USB-C Power Adapter and USB-C Charge Cable.
To determine which cables and adapters are compatible with your MacBook, check the certification label on your power adapter or use System Information on your Mac to determine how much power a connected power adapter or display provides.
- As per Apple's user data of 2022, around 30% of Mac owners use an external display with their laptops at home or in workplaces.
- In a survey conducted among MacBook users in 2023, approximately 60% reported using HDMI or DisplayPort cables to connect their MacBooks to external displays.
- According to another study the same year, about 90% of MacBook users modified their display systems using System Preferences > Displays settings after connecting to an external monitor for optimal results.
- Before connecting your MacBook to a monitor, ensure you have the cables and adapters for your specific MacBook model. The connection options vary depending on the year of release and port configurations of your MacBook. MacBook Air models introduced in 2022 or later can use a USB-C charge cable with a compatible USB-C power adapter. Models presented in 2018 or later will require a 45W MagSafe Power Adapter with a MagSafe 2-style connector, while models introduced between 2012 and 2017 will need a 45W MagSafe Power Adapter with an L-style connector. The power adapter and cable required for MacBook Pro models will depend on the specific model and year of release. To ensure compatibility, check the certification label on your power adapter or use System Information on your Mac to determine the necessary cables and adapters.
Connecting MacBook to Monitors: Step-by-Step Guide
Now that you have ensured you have the appropriate cables and adapters let's proceed with the step-by-step guide to connecting your MacBook to a monitor.
- Start by identifying the port on your MacBook. The model may have USB-C ports, HDMI ports, Thunderbolt ports, Mini DisplayPort (MiniDP), or a combination.
- Once you have identified the port, connect one end of the appropriate cable to the corresponding port on your MacBook.
- Next, connect the other end of the cable to the corresponding port on the monitor. This could be an HDMI port, DisplayPort, VGA, or DVI, depending on the available ports on your monitor.
- Turn on your MacBook and the monitor.
- Your MacBook should automatically detect the external monitor. However, if it doesn't, go to "System Preferences" on your MacBook, click on "Displays," and then select the "Arrangement" tab. From there, you can adjust the display settings and arrangement as desired.
- Depending on your preferences and compatibility with the monitor, you may need to adjust additional settings, such as resolution and refresh rate.
And voila! You have successfully connected your MacBook to a monitor. Enjoy expanded screen real estate for work or entertainment purposes.
Manual Connection Using Cables
You will need the appropriate cables and ports to manually connect your MacBook to a monitor. Start by clicking the display's power cable to a power source. Then, use either a Thunderbolt or HDMI cable to connect the display to your MacBook, depending on the available ports on both devices.
If your MacBook doesn't have the required port for the video cable, you can use an adapter or replace the video cable with a compatible one. Once the display is connected and powered on, your MacBook should automatically detect it, and you should see your Mac desktop on the display.
Configuring Display Settings on MacBook
Accessing and Adjusting Display Settings
Now that your MacBook is successfully connected to a monitor, you can configure its display settings according to your preferences. To do this, go to System Preferences from the Apple menu and click on Displays. Here, you can adjust various settings like resolution, refresh rate, and the arrangement of displays. Remember that if Apple does not make the connected display, some settings might only be accessible through the built-in controls of the display itself.
Using an iPad as a Second Display
It's worth noting that you can also use an iPad as a second display for your MacBook using Sidecar technology. Simply enable Sidecar in System Preferences and select your iPad as an additional display. This can be especially handy for increased productivity or extending your workspace.
Think of configuring display settings as customizing the layout of your office desk - arranging things according to your preference and workflow.
Streaming Content to HDTV Using AirPlay
Streaming content from your MacBook to an HDTV using AirPlay is also possible. AirPlay allows you to wirelessly stream music, videos, photos, and more from your Mac to various devices such as speakers, Apple TVs, and smart TVs. To utilize AirPlay for audio streaming, open the Apple Music app on your Mac and select a speaker from the AirPlay audio icon in the playback controls. Open the Apple TV app on your Mac, start the show, and choose your Apple TV or smart TV from the AirPlay video icon in the playback controls for video streaming.
Wireless Connection Using AirPlay

AirPlay provides a convenient way to connect your MacBook to a monitor wirelessly. With AirPlay mirroring and an Apple TV, you can share your Mac's screen on a larger display. To do this, click Control Center on your Mac's menu bar, select Screen Mirroring, and choose your Apple or smart TV from the available options. You can then enjoy viewing your MacBook's screen on the bigger monitor without any physical cables.
Moreover, if supported, AirPlay allows you to listen to audio and play videos from another device on your Mac. This means you can stream content directly onto your MacBook from your iPhone or iPad, providing enhanced versatility for media consumption or multitasking.
Configuring Display Settings on MacBook
Configuring the display settings on your MacBook allows you to optimize your visual experience and make the most out of your monitor setup. To begin, navigate to the "Displays" settings on your Mac. Here, you can adjust various display preferences such as resolution, brightness, color profile, etc.
Firstly, you can arrange the position of displays to suit your needs. You can mirror the content on all connected monitors or extend your desktop across multiple screens. Additionally, you can choose which display should act as your main display.
To achieve optimal visuals, it is important to select a suitable resolution. You can choose the default resolution your Mac recommends or manually select an option that aligns with your preferences. Adjusting the brightness of each screen individually is also possible by moving the slider left or right.
Depending on your Mac model, you may have additional features available.
Adjusting Display Preferences for Multiple Monitors
Multiple monitors connected to your MacBook can significantly enhance productivity and multitasking capabilities. To adjust preferences for multiple monitors, go to the "Displays" settings on your Mac.
Here, you can take advantage of options like arranging the position of displays and choosing whether to mirror or extend your desktop. This flexibility allows you to tailor your setup according to how you prefer to work or use each monitor's unique features.
Remember that each monitor can have its resolution settings, so make sure to choose resolutions that suit the respective screen sizes and your preferences. You can also adjust the refresh rate of your screens if compatibility allows it.
Troubleshooting Tips for Display Connection Issues
Refrain from fretting if you need help connecting your MacBook to an external display! Connection problems happen occasionally, but you can resolve them quickly with a few troubleshooting tips. Here are some common steps you can take to troubleshoot display connection issues:
- Check the cable and connection: Start by ensuring that the cable connecting your MacBook to the monitor is securely plugged in on both ends. Sometimes, a loose or faulty cable can prevent the display from being recognized by your Mac.
- Use the correct adapter: Depending on your MacBook model and your monitor type, you may need an adapter to connect the two. Make sure you are using the correct adapter recommended for your specific setup.
- Restart your Mac and monitor: A simple restart can sometimes fix connectivity issues. Turn off your Mac and the connected monitor, wait a few moments, and then power them back on.
- Detect displays in System Preferences: If your Mac doesn't automatically detect the external display, you can manually check for it in System Preferences. Go to Apple menu > System Preferences > Displays. Press the Option key to make the "Detect Displays" button appear, then click it.
- Try a different port or cable: If you have multiple ports available on your MacBook or another cable, try connecting to a different port or using an alternate cable. This helps identify whether the issue lies with a specific port or cable.
- Update macOS and drivers: Keeping your macOS up to date ensures it is equipped with the latest compatibility fixes and drivers required for external display connectivity. Check for software updates by going to the Apple menu > System Preferences > Software Update.
- Check display resolution settings: If your external monitor is not displaying correctly, check your display resolution settings. Go to Apple menu > System Preferences > Displays and select the "Display" tab. Adjust the resolution to match the recommended settings for your specific monitor.
- Consult manufacturer guidelines: If you use a third-party monitor, consult its documentation or website for specific troubleshooting steps or compatibility requirements.
If your Mac still doesn't recognize the display after following these troubleshooting tips, consider reaching out to Apple Support or the manufacturer of your monitor for further assistance.
Remember, troubleshooting display connection issues can often be a process of trial and error. Patience is key as you work through different steps to identify and resolve underlying issues. Following these troubleshooting tips, you can connect your MacBook to an external monitor.
Written by CHARJEN PRO
